Thursday 31 March 2016

Living Quarters Map Layout in Der Eisendrache Zombies - Call Of Duty Black Ops 3


Der Eisendrache Map Layout: Main Spawn Area -- Outside Castle Gate -- Main Gate Courtyard Area -- Trophy Room -- Upper Courtyard -- Living Quarters -- Armory -- Mission Control -- Family Crypt -- Undercroft -- Teleporter Room -- Rocket Platform --


Easter Egg Guide Walkthrough: -- Part 1 -- Part 2 -- Part 3 -- Part 4 --


Hi guys,

here is the Living Quarters map layout for Der Eisedrache zombies in Call Of Duty Black Ops 3. This area is a tight squeeze and floods with zombies quickly when you least expect it. Samantha's room is also in this area when you come in from the Lower Court Yard area, its the room on the left.

The room looks like any other little girls room at the time even if she does scare the crap out of you in reality with her freaky voice and weird obsession of playing zombies all the time and trying to kill you....maybe the store ran out of Barbie dolls? Does she hold a vengeance against the store owner? Who knows? The girl freaks me out.....anyway lets see what is in the Living Quarters area of Der Eisendrache and see what we're up against.

The Map Layout For Living Quarters Area:


This area has a 5 key points, related to:
  • 1 Painting Location related to the WOLF BOW upgrade quest
  • 1 Gatekeeper skull location related to the WIND BOW upgrade quest
  • 1 Fireplace related to the FIRE BOW upgrade quest
  • Door at the end of the area leads onto another corridor housing suits of armour and access to the POWER SWITCH ROOM
  • 1 Teddy Bear Musical Easter Egg Location


Reading the Bow guides you will find that the painting in this area is 1 of 4 scattered throughout the map that needs to be activated in a certain order for one of the steps for the Wolf bow upgrade.


The fireplace we know is used to be lit with 1 of 3 arrows when the piece of magma rock appears after you kill a zombie while standing in the highlighted fire circle in the fire bow guide.


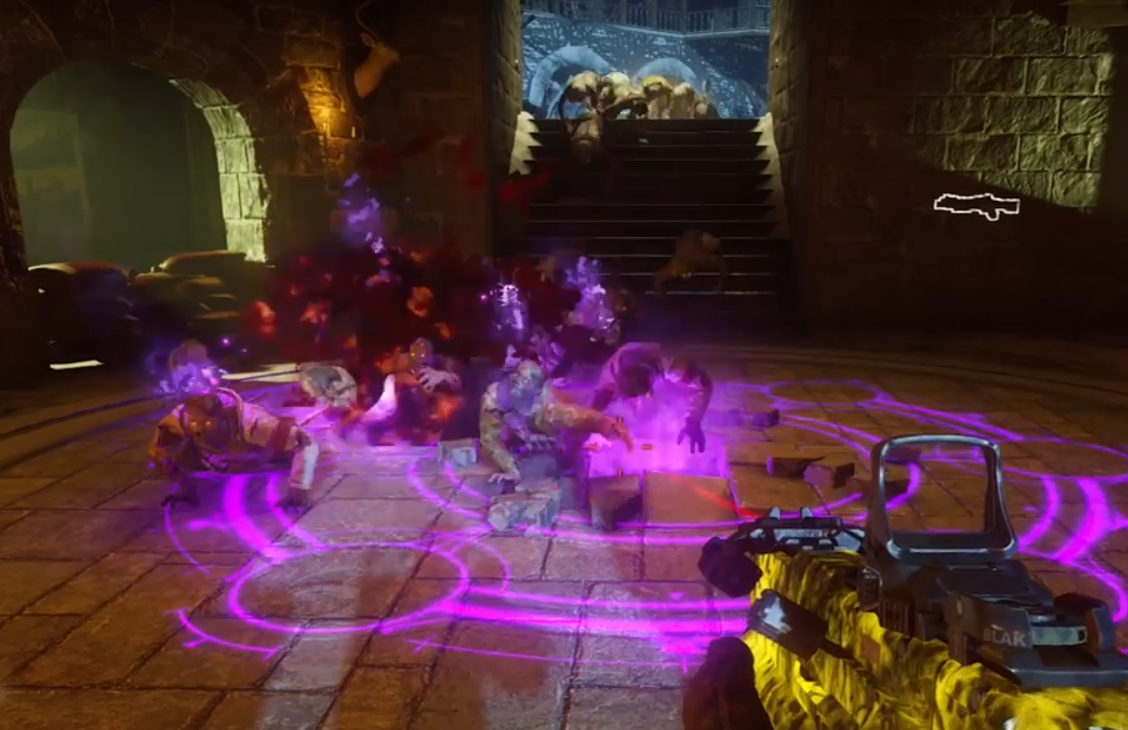
The gatekeeper skull is 1 of 6 skulls scattered throughout the map and is related to the Wind bow upgrade. You simply need to find all six and activate them, once all activated, simply head back to the trophy room to see them all floating by the urn you will have previously uncovered. Then you will free the spirit from within the urn by getting crawlers into the glowing purple circle and letting the floating skulls cave their heads in as a sacrifice to the spirit.

Thanks for reading as always guys.

Henry

Monday 28 March 2016

Upper Courtyard Map Layout in Der Eisendrache Zombies - Call Of Duty Black Ops 3


Der Eisendrache Map Layout: Main Spawn Area -- Outside Castle Gate -- Main Gate Courtyard Area -- Trophy Room -- Upper Courtyard -- Living Quarters -- Armory -- Mission Control -- Family Crypt -- Undercroft -- Teleporter Room -- Rocket Platform --


Easter Egg Guide Walkthrough: -- Part 1 -- Part 2 -- Part 3 -- Part 4 --
 
 
Hi guys,
 
here is the Upper Courtyard Map Layout for Der Eisendrache Zombies in Call Of Duty Black Ops 3. This area is a nice large area compared to a lot of the small rooms and tight corridors in other sections. It links to the DEATH RAY trap area, the MISSION CONTROL area and the Barracks / Bell tower. There is also an exit point in the centre where the destroyed armoured car is located from the UNDERCROFT room.
 
Lets check out what is in the area in the map layout first for the UPPER COURTYARD:
 

Upper Courtyard Ground Floor


Upper Courtyard 1st Floor - Barracks and Bell Tower


In this area we have the following:
 
  • Gobblegum machine
  • 1 Possible electrified item location - Clock in the Barracks section
  • 2 Wall Purchasable Weapons
  • 1 Painting Location related to the WOLF BOW upgrade
  • 1 Gatekeeper skull location related to the WIND BOW upgrade
  • Computer Location as Part of Main Easter Egg "SIMON SAYS" steps
  • Arrow Upgrade Quest in the Bell Tower related to the FIRE BOW quest
  • Wondersphere transport
  • Random Box Location
  • Wonderfizz Location
  • Access to the Death Ray
  • Access to Mission Control Room
  • Access to Trophy Room


These steps lead up to the Mission Control Divinium door that can be opened using credits to gain access to the Mission Control Room area. This is handy in case you haven't turned on the Power to open the main door downstairs, you can still find a way in.....it will just cost you 1250 bucks! One perk is that it will add to your Liquid Divinium supply so you can get more Gobblegums at a later point after the game.


In the Bell Tower / Barracks section of the 1st floor, you will see one of the paintings on the wall related to the Wolf Bow upgrade. These paintings need activated in a particular order when on the WOLF BOW upgrade quest and there is 4 in total to find.


Where the painting is located in the bell tower, there is a set of stairs heading up to the top of the tower. When you get to the top of the tower, you can reveal a new upgrade quest for the FIRE BOW by shooting the logo on the wall with the Wrath of the Ancients Bow.

Be careful when in the Bell Tower especially during the start of a round or mid round, as when zombies spawn they come in real fast and do not leave a lot of room to manoeuvre at the top or bottom of these stairs. Watch out when at the very top and only covering the stairs, as zombies can jump up onto the ledge behind you and pull themselves up, usually scaring the wits out of you and munching on your leg when you least expect it.


Above is the possible electrified item location of the clock in the barracks section of the Upper Courtyard. It can be easy to miss sometimes as you come up the stairs its out of your field of view. Creek your neck round from time to time when running past this area when you know electrified items are taking place in the round to see if its activated.

Thanks for reading as always guys.

Henry


Friday 25 March 2016

Trophy Room Map Layout in Der Eisendrache Zombies - Call Of Duty Black Ops 3


Der Eisendrache Map Layout: Main Spawn Area -- Outside Castle Gate -- Main Gate Courtyard Area -- Trophy Room -- Upper Courtyard -- Living Quarters -- Armory -- Mission Control -- Family Crypt -- Undercroft -- Teleporter Room -- Rocket Platform --


Easter Egg Guide Walkthrough: -- Part 1 -- Part 2 -- Part 3 -- Part 4 --


Hi Guys,

here is the map layout for the very small section of Der Eisendrache called the Trophy Room. Although it is basically a small mine shaft that leads to a very small trophy room, it plays one heck of a significance in this map due to its many links to most of the Wrath Of the Ancients bow upgrades within this level.

First lets see the map layout for the TROPHY ROOM to give us an idea what we are looking at:


The mineshaft area can be accessed straight from the main spawn area. The door at the bottom of this map is adjacent the Quick Revive Perk machine and costs 750 to open. From there it is a bit of a tight squeeze in here with a very narrow corridor accompanied with lots of zombie spawn points from top to bottom. This area also links to the UPPER COURTYARD area through the opening of a Divinium door at the end in the actual Trophy Room.

KEEPER SKULL LOCATION in this area:


Here is a summary of what can be found in the TROPHY ROOM:

  • 2 Wall purchasable weapons - KRM-262 and the L-CAR 9
  • Mule Kick Perk Machine
  • 1 Gatekeeper Skull - Relates to Wind Bow Upgrade
  • 1 Gatekeeper Stone Slab Location - Relates to Main Easter Egg Guide
  • 1 Painting - Relates to Wolf Bow Upgrade
  • Gobblegum Machine
  • 1 Divinium Door that leads to the UPPER COURTYARD


The actual Trophy Room being used in the Wind Bow Upgrade Quest:


The below picture is the view from the hole in the wall beside the Mule Kick Perk Machine which is part of the STORM BOW upgrade quest. This step requires two firestacks on the outer wall of the castle to be set alight with the normal Wrath of the Ancients bow. Later you will return to here to charge up electrified arrows to electrify the fire. Check out the STORM BOW guide to see how this is done.


Thanks for reading as always guys.

Henry


Wednesday 23 March 2016

Lower Courtyard Map Layout in Der Eisendrache Zombies - Call Of Duty Black Ops 3


Der Eisendrache Map Layout: Main Spawn Area -- Outside Castle Gate -- Main Gate Courtyard Area -- Trophy Room -- Upper Courtyard -- Living Quarters -- Armory -- Mission Control -- Family Crypt -- Undercroft -- Teleporter Room -- Rocket Platform --


Easter Egg Guide Walkthrough: -- Part 1 -- Part 2 -- Part 3 -- Part 4 --

Hi guys,

here is the map layout for the MAIN GATE COURTYARD AREA in Der Eisendrache zombies in Call of Duty Black Ops3. This area can be entered by from exiting to the right of the main spawn area and then opening the gate that is located beside the DOUBLE TAP PERK machine.


It is a 3 tiered area which has several important features related to Upgrade Quests, obtaining the Wrath of the Ancients Bow as well as an array of useful gizmos such as the Gobble Gum Machine and the Wondersphere that is used to launch your ass very high into the air and land on one of the landing pads you have activated around the map. Each Wondersphere in an area links to one landing pad and it must be activated first before you can fast travel to different points on the map with it.

Here is the map layout for the 3 tiers below for this area:

Ground Tier


Second Tier


Third Tier


As an overview, this area contains:

  • 2 Wall Purchasable Weapons
  • Mystery Box Location
  • Dragon head location - feed with zombie souls see Wrath of Ancients Guide
  • Fireplace - relates to UPGRADE QUEST for Fire Bow guide
  • GobbleGum Machine
  • Landing Pad
  • Build Table
  • Wonderfizz Machine
  • Access to Samantha's room
  • Zombie Trap
  • Electrical Vase Location - Relates to UPGRADE QUEST for Storm Bow Guide
  • Rocket Shield Part Spawn Location


Basically a lot of this area relates to different Upgrade Quests for the bow. For instance, the Wondersphere is used to shoot glowing circles that can be seen when being launched from it when the FIRE BOW arrow upgrade quest has been activated, as well as activating the fireplaces for the fire bow arrow upgrade.


The Electrical vase in this section also only becomes active near the end of the STORM BOW bow upgrade quest when the storm arrow has been picked up from the top of the castle. There are 3 of these vases around the castle and are used to electrify fire stacks that are lit at the start of the STORM BOW upgrade quest.

The Dragon head is also part of the main Easter Egg as its needed to get the Original Wrath of the Ancients Bow and Arrow from the tomb located near the UNDERCROFT area in this level.

Thanks for reading as always guys.

Henry

Sunday 20 March 2016

STORM BOW UPGRADE in Der Eisendrache - Call Of Duty Black Ops 3 Zombies


Der Eisendrache Map Layout: Main Spawn Area -- Outside Castle Gate -- Main Gate Courtyard Area -- Trophy Room -- Upper Courtyard -- Living Quarters -- Armory -- Mission Control -- Family Crypt -- Undercroft -- Teleporter Room -- Rocket Platform --


Easter Egg Guide Walkthrough: -- Part 1 -- Part 2 -- Part 3 -- Part 4 --


Hi guys,

here is how to upgrade the original Wrath of the Ancients bow to the amazingly powerful and kick ass STORM BOW in Der Eisendrache zombies for Call Of Duty Black Ops 3. As with all the other bows, you do need the original Wrath of the Ancients bow and arrow before you can do any of these steps so check out my guide on how to get this.

Lets get down to the nitty gritty and get this bow upgraded for you:


Step 1 - This party is going down a storm


Head up to the middle part of the castle to get this upgrade quest started and near the DEATH RAY switch, look up at the small turret / tower which is on this level. You will see on top of the small tower an iron compass that you need to shoot with the bow and arrow. This will cause some dodgy plasterwork on the tower to come lose and a few bricks will fall away revealing the Lightning Arrow. Pick this up and your on the right path to get an amazingly powerful bow.

Remember not to activate any other quests while in the process of completing this one as it will totally cancel it out whatever stage you have got to. Finish this one 100% first before moving onto the next one.


Step 2 - Relight My Fire

Next we need to find 3 locations on the outside of the castle that need to be lit on fire. These locations have firestacks that simply need an arrow from the Wrath of the Ancients in order to set them alight.


  • Location 1 - 2 of these firestacks are easily shot at by going to where the MULE KICK perk is located and looking out across the land, where the huge hole in the wall is. This will reveal a castle wall in the distance where 2 firestacks can be seen. Simply shoot an arrow into each of these circular turret tops to set them on fire.


  • Location 2 - Beside the tower which has the Wonderfizz Machine, Launchpad and one of the computers with all of the screens. This one is a little bit tricky and can waste a few arrows trying to set it alight as it is a fair bit in the distance. Robin Hood took 3 or 4 goes to do it and he's an expert, so don't be disheartened if you miss it 3 or 4 times. Simply peer over the small dip in the wall and look in the distance toward the ground. Check out the screenshot above to see its exact location on the hill. It can be hard to see but you will know when you have hit It correctly when the warm glow of the fire kicks in.


  • Location 3 - This firestack is located at the rocket test facility. It is located on the cliff face above the rocket launch pad. When you come out of the teleporter onto the pad, look up on the cliff to where the trees are located and they will part where the firestack is. Simply shoot an arrow up to it to set it alight and your done. Check the screenshot above for its location as its also a hard one to see.
 
Once all 3 locations have been completed, the quest logo will appear in the top left hand corner of your screen, indicating that you have now completed around a quarter of the tasks for this upgrade quest. This means your on the right track so lets move onto the next step.
 

Step 3 - Lara Croft? Oh wait you said Undercroft...


Next we need to head down to the UNDERCROFT area of the castle, located in the belly of this beast, and activate the ANTI GRAVITY within this room. Then we will test how fit we are by wall running all away around the room and while doing it, without falling off or touching the ground at any point, walking over symbols that have appeared on the walls to activate them. There symbols  that need activated look like panels with ghostly wind emitting from them and when you have successfully activated them all, you can drop down off the wall. They will then start to glow bright blue letting you know they are active.
 

Step 4 - Flowers for me?.....wait there is a vase but no flowers!


Once you have completed step 3, you will notice that around the map there will appear these electrically charged vases in these 3 areas:
 
  • Bell Tower
  • Rocket Facility
  • Near the Main Spawn Area

When you locate one, you need to charge them up with zombie souls, normally around 5-6 souls for each vase. you can kill the zombies anyway you like it doesn't matter, with any weapon....even your shoe if it was possible. Once all of the vases will not take anymore souls in each location, you can move onto the next step.


Step 5 - Did you pay your electric bill?


Now what we need to do is use the vases stored souls to electrify our arrows, that we will use to shoot into each of the firestacks that we lit in step 1. So locate one of the vases, equip the bow and while in front of one of the vases, charge a shot to full strength. As you do this, you will notice that the arrow becomes electrified and the energy stored in the vase is transferred to the arrow on your bow.


Now you need to go to all the firestack locations in step 1 and shoot these electrified arrows into the flames. This will cause the flames to be electrified with an electrical field emanating around them which is a very sweet bit of visuals in this game. Each time you fire an arrow and miss, you will need to go back to a vase and charge the arrow again, however if you successfully hit the flames with the electrified arrow, whichever vase you charged the arrow from, will turn back to normal and cannot be used to charge your arrows anymore. Simply find a different vase that is still electrified to complete shooting each of these firestacks again.


Step 6 - Back to square one


Now once all of the firestacks are electrified, head back to where we initially picked up the arrow to begin this quest when we shot the compass on top of the small tower. We will need to shoot the compass again, only this time it will burst into flames and fire out some electricity bolts here there and everywhere. You probably upset it, but in return for annoying it, it will drop the reforged arrow after a few moments. Simply pick it up and head down to the Undercroft section to place the arrow on the gatekeepers shrine that relates to this arrows symbol.


As with all the other arrows, simply kill zombies near the arrow to collect zombies souls into the arrow. Once no more souls can be collected, equip the Wrath of the Ancient Bow and place it on the shrine where the reforged arrow is now located. After a bit of magical intervention, pick up the bow again and you will have the newly upgraded STORM BOW, easy as 1 2 3.


This bow when charged creates a whirlwind effect lifting zombies into the air and spinning them around as well as firing electrical bolts into them when in its radius. If you like BBQ'd zombies cooked by lightning rather than flame grilled, this bow is for you and is definitely my favourite bow out of them all.

If unsure of any of these steps at all, then check out MRDALEKJD's video for this bow on Youtube:


Thanks for reading as always guys

Henry