Maps: Main Map Layouts -- Portals -- Doghouses -- Pack-a-Punch -- Aether Tears -- Blood Burner Aether Motorbike -- Exfil Locations -- Buy Stations -- Aether Zones -- Gas Stations -- Mystery Box Locations --
Hi guys,
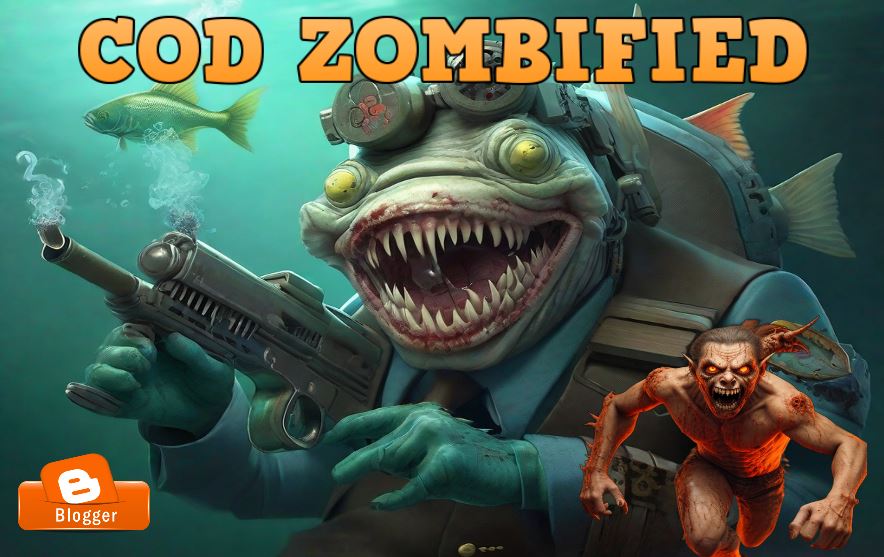
Here are all of the Mini Bosses and the Main Boss within Operation Deadbolt in Call of Duty MW3 Zombies. Some are hard as nails, tough as your old boot, while others are light as a feather to take down. Don't under estimate some though, as some look easy peasy, but can sometimes turn into a nightmare when you least expect it.
Here are the culprits within this map and are on the zombies "I most wanna destroy list":
- The Knight
- The Bishop
- The Rook
- The King
- Mega Abomination
- Stormcaller
- Legacy Fortress Warlord
- Orcus
The Knight - Contributes Towards The Vault at H7 Grid Reference
One of the mini bosses on the map you will encounter, who drives around standing in the back of an armoured truck, is known as THE KNIGHT. Not the Dark Knight, not even a knight in shining armour riding around on a horse....it is a 21st century warfare version of a knight which has upgraded body armour and a gun that packs a high calibre punch.
He also rides around on an armoured truck that is worth several hundred horses in power and in defence.
Although all this may make him sound scary, he is actually very easily to destroy, especially with a Pack-a-Punched weapon. Level 2 Pack-a-Punch or level 3 will take him out of the Operation Deadbolt equation extremely quickly and you will wonder what all the fuss was about and why he is even classed as a boss.
Simply keep an eye out for him driving around in a single ARMOURED VEHICLE on the map, which normally follows the rail road tracks around the inner section of the map between the LOW THREAT ZONE and the MEDIUM THREAT ZONE.
The best way to slow him down and to destroy him, is to park a vehicle in front of his armoured trucks path and let it smash into it. This will slow him down enough to allow you to hop into the back and deal with him as he hides for cover behind his beloved truck which you are about to turn into tin cans in a matter of minutes.
Once you destroy him, despatch his driver as well to make sure the other bosses in the map get the message that you are not messing around.
When he is destroyed, go over to where he fell and collect the loot, where you will also find a SMART PHONE DEVICE that will "SEND A MESSAGE TO H7" which is the HIDDEN VAULT on the map that is at.....grid reference H7.
The Bishop - Contributes Towards The Vault at H7 Grid Reference
You can start to see a theme developing here in the naming of these mini bosses, as it does start to feel a bit like chess. Could it be because they are strategically placed around the map? Who knows?
You will find him in a cave near the POPOV POWER area. He is usually inside a cave with a few bodyguards in the KOTOVO BLOCKS area of the map. He has some light additional armour and sports a bladed weapon that he will try and take a swipe at you with.
Sometimes when you drive in there will be smoke popping off inside this tunnel which makes it hard to see the enemies, but also makes it easier for the Bishop to come at you with his bladed weapon, while his fellow grunts distract you with incoming fire.
As per usual, all you have to do is take him down, which again is fairly easy, and he will drop another SMART PHONE DEVICE that will "SEND A MESSAGE TO H7" and to the VAULT.
The Rook - Contributes Towards The Vault at H7 Grid Reference
Next up we are heading over to the the domain of a sniper at the hotel at the GHALIA SEASIDE area. He lives in a fancy hotel in this map with a huge swimming pool outside, lucky man, however he does not want any visitors coming over to use his hot tub or his swimming pool...so for his next pool party.....your not invited....but we will invite ourselves to be polite.
Entering this hotel building, you will find lots of booby traps along the fire exit stairwell that leads up to the floor he is on, in the form of land mines.
When you destroy them or trigger them by going prone and setting them off, you will open a door on the final floor the sniper is located on and once opened, you will be greeted by the welcoming party, in the form of a SENTRY TURRET pointed right at your head.
In front of the SENTRY TURRET is another nice little present in the form of another land mine. Simply destroy the SENTRY TURRET and the land mine and when you do, the door immediately to the right of where the turret was located is a room which contains THE ROOK.
He might be hiding in the corner or behind the bed as cover in the room, however using high explosives is an easy way to destroy him or flesh him out of his hiding place. He is not difficult at all to kill, however some shots he fires off very quickly from his sniper rifle can down you pretty quickly if you are already damaged or do not have any armour plates equipped.
Simply go in and kick some butt, then pick up the another SMART PHONE DEVICE that will "SEND A MESSAGE TO H7" and to the VAULT one last time.
Vault Location - Give me a high H5....no wait it's H7!
Even though this post is about the bosses and mini bosses, the VAULT LOCATION is....strangely enough.....at grid reference H7.
Here is a map with the location of the VAULTfrom WZHUB.GG tactical map. The interactive map made on the website https://wzhub.gg/ which allows you to bring up the overall tactical map of Urzikstan, then on the left hand side of the screen, filter down through showing only individual features on the map which is absolutely awesome:
I'm not associated with this website in any way and I'm simply using their screenshot as a reference. The map is crafted by the individuals behind this site, not by me. It appears to be consistently updated whenever a new feature spawn location is discovered, which is immensely helpful given the impressive level of detail.
Remember we mentioned about the mini bosses names being THE ROOK, THE KNIGHT and THE BISHOP? Good, because to the right hand side of the VAULT DOOR AT GRID REFERENCE H7, you will notice a CHESS BOARD.
This CHESS BOARD will have 3 BLACK PIECES knocked over, meaning that you have eliminated all 3 bosses required in order to UNLOCK the VAULT. If there is a black piece still standing, you may have thought you killed a boss, when you may be in error.
Just make sure all 3 are knocked over or the VAULT will not unlock, otherwise you will have to go on the hunt again to find the missing boss who has eluded you.
The King - Checkmate
Now all that is left is THE KING chess piece, which you are probably wondering where the heck THE KING is hiding...well....he is in the safest place on the map....well was the safest until you opened the door and let all the heat out. He is in the VAULT!
When you start to go through the LOOT BOXES in the VAULT, one of them will be a MIMIC in disguise who is a bit stronger than other MIMICS on the map, but not by much. It is especially no match for your Pack-a-Punched weapons if you have them equipped.
When he appears, as you go to loot some of the boxes, simply obliterate him into dust with no mercy. When he is finished you will get experience points for an elite zombie kill as per usual, then you can ransack the loot boxes in peace knowing that you are out of danger for now.
Vault Rewards - Payment for a Hard Days Work
In the VAULT you can get the RAY GUN quite frequently in here as it is a good reward for all the hard work you put in to get to here so it definitely is worth having a look in this vault.
A brief list of some of the things you can get in here is:
- Ray Gun
- Kill Streaks
- Gold Bars
- Self Revive Kits
- Purple Tactical Gear such as LT53 Kazimir
- Perks
- Aether Tools and much more!
Mega Abomination
This boss looks quite scary and.....if you are scared.....you have every right to be, as he is a danger to everyone in the map. He is huge, has 3 heads and looks like he works out at the gym regularly as his muscles are huge which he is either going to smack you with, try to eat you or shoot 3 giant lasers from each of his mouths at you to barbeque you.
He is found in the HIGH THREAT ZONE in Operation Deadbolt and is a formidable foe. With the right upgrades, Pack-a-Punched weapons and ammo mods though, it can make your life much much easier taking him out.
He doesn't drop anything too special, mainly AETHER CANISTERS with lots of ESSENCE in them, along with some nice pieces of loot such as 3 PLATE ARMOUR VESTS which no one can do without.
There can be 3 of these at any one time patrolling the HIGHER THREAT ZONE so don't go training zombies across a huge distance in the HIGHER THREAT ZONE with the MEGA ABOMINATION in tow, as it may cause another one to inadvertently spawn by accident and you will face a much tougher challenge than you had originally thought.
Storm Caller - The Aether this guy Generates is Going Down a Storm!
Venturing into the heart of this AETHER ZONE unveils a formidable foe known as the Storm Caller. This mini-boss poses a considerable challenge, demanding a hail of bullets to subdue. Yet, the spoils of victory are tempting—a coveted Golden Skull, accompanied by treasures like a 3-plate vest and a spacious large rucksack are some of the spoils of war on offer here. The value of these items becomes apparent when considering their hefty price tag at a typical buy station, where each piece could set you back around 10,000 points.
The loot drop from the Storm Caller remains delightfully unpredictable, ensuring that each playthrough introduces a fresh element of surprise. While the Golden Skull is a guaranteed prize, its resale at a buy station fetches a handsome 5,000 cash to wield at your discretion.
For those facing the Aether Storm in a LOW THREAT zone, a strategic advantage emerges. The undead minions summoned by the Storm Caller prove more susceptible to defeat, facilitating a somewhat easier takedown of this menacing adversary.
Having a Pack-a-Punched weapon also makes killing him much easier and obviously, the higher the level it is Pack-a-Punched to, it will make quicker mince meat out of him.
Approach the Storm Caller cautiously, for its proximity not only drains your health but also replenishes its own, intensifying the struggle to vanquish this formidable foe. Once conquered, the coveted Golden Skull falls to the ground, triggering a race among teammates to claim its lucrative rewards.
Only one person can pick this skull up and there is not one for every single player in your team. Be greedy and run to it as fast as you can to pick it up or offer it to team mates who are low on cash and need some help.
However, keep in mind that this prized possession cannot be carried over to subsequent playthroughs; it's a use-it-or-lose-it scenario, adding an extra layer of urgency and strategy to your Operation Deadbolt escapade.
This skull is basically a FREE PACK A PUNCH in the LOW THREAT ZONE as you can sell it at a BUY STATION to get 5000 points, or put it to anything you would like to purchase.
Legacy Fortress Boss
This is one of the more tougher bosses on the map, not actually killing him, but more the actually getting to him I find difficult, especially if playing on solo play. It isn't for the faint of heart. This Mercenary Stronghold, located west of Popov Power in D2 in the MEDIUM THREAT ZONE, poses a significant challenge with its high-level adversaries, especially the formidable Shock Troopers.
In order to get access to the LEGACY FORTRESS, located in the TALANOV OUTPOST area, you will need to get the LEGACY FORTRESS KEYCARD first.
This can be obtained by looting a MERCENARY STRONGHOLD SAFE.
In order to get access to one of these safes, you will need to get a MERCENARY STRONGHOLD KEYCARD which can be obtained in the following ways:
- Purchase it for 2,000 Essence from a Buy Station, by far the easiest method, but most costly
- Seize it after successfully taking down a smaller Mercenary Camp / Base
- Loot it off a Mercenary Convoy by defeating the Mercenaries within
You will then use the MERCENARY STRONGHOLD KEYCARD to open the door to these stronghold locations, clear out the enemies and then start drilling the safe, holding off attacking enemy waves until the safe is opened. Then you can simply pick it up.
Once you have obtained the LEGACY STRONGHOLD KEYCARD, make your way into the centre of the LEGACY FORTRESS shown in the top left of the map, where you will have to battle helicopters chasing you, as well as armoured human AI shooting at you with pretty heavy weaponry that does some real damage.
The key here is to take your time, seek cover when needed and constantly replenish your armour plates anytime you can as you will go through them pretty quickly when taking on this challenge.
Simply try to get into the middle of the fortress after annihilating all enemies in the surrounding area, plus the chopper that will be on your tail with death from above, firing at you while you assault the fortress. You'll need to navigate through waves of Mercenaries, traps, and bloodthirsty zombies.
The key steps are outlined below in defeating the fortress boss:
- Find the Legacy Fortress Keycard - obtaining this crucial item by looting a Mercenary Stronghold Safe through various means.
- Take down the Helicopters - Prioritize eliminating Mercenary Helicopters for a smoother experience inside the Fortress.
- Clear the Mercenaries outside - Deal with ground-based Mercenaries before entering the main building in the centre, which you unlock the door with the LEGACY FORTRESS KEYCARD
- Head inside and clear out the Mercenaries - Progress cautiously through each room, clearing Mercenaries strategically.
- Mind the traps - Be aware of traps such as dummies, sentry turrets, and sound barriers to avoid unexpected setbacks.
- Defeat Legacy - Engage Legacy, a formidable Warlord, by first neutralizing traps and Mercenaries protecting them. Utilize high-damage, quick-fire weapons with good recoil control to prevail.
Upon defeating Legacy, the Fortress is marked as complete, and a high-level reward rift opens nearby. Inside, discover valuable loot, exfil items, and high-level weaponry, including coveted items like the Tactical Negotiator.
Orcus Main Boss
Fighting this boss can seem like a a daunting task, as it unfolds in the Act 3 story mission, accessible only after conquering all Act 3 missions, however he looks scarier than he is really.
The final act poses the greatest challenges, demanding players to grind their way through the missions before facing off against the highly anticipated Aether Worm boss, Orcus. Contrary to rumours "worming" their way around the internet, Orcus does not appear during MW3 Zombies' final Exfil.
Tips & Strategies to Defeating Orcus
It's advisable to assemble a squad of at least four players as going solo can be not only a tough ask, but makes it tough as hell trying to take this boss down on your lonesome.
The Assimilation feature allows you to invite additional players to join your squad which can be of great help to you and to others who may need an extra team mate to help them out, it works both ways lending a helping hand.
Before Exfilling to Zakhaev's Stronghold, marked on the map with red smoke, ensure you have some of the following:
- Arm yourself with potent weapons - upgrading them to at least Pack-a-Punch Level 2 and ideally Level 3
- Secure a Self-Revive - Store several if possible in your backpack to give you another chance should you go down and no one can come to your aid
- Consume as many Perk Cans as you can find for added advantages
- Maximize squad members for increased firepower
- Stock up on spare Armor Plates, ensuring each player has a 3-Plate Vest
- Apply any carried Ammo Mods for enhanced combat efficiency
- Use distraction / decoy grenades to lure zombies away from you periodically
Lets do this Orcus!
Once inside Zakhaev's Stronghold and equipped with the Neutralizer, prepare for the showdown with Orcus. Identify Orcus' weak points, which are the glowing purple areas along its body, and target them for critical hits. This is what takes his health down the quickest.
As you shoot this critical hit points, while dodging his own attacks, keep an eye out for incoming zombies from the left, right and behind, while you are focusing on the colossal boss. Sometimes the amount of zombies can pile up on you without noticing and if a large pile all hit you once at the same time, you can go down pretty fast on the battlefield, so watch out.
Orcus' Attacks
Orcus unleashes formidable attacks that players must navigate skilfully and keep an eye on him at all times. These attacks include:
- Aether Beam - Orcus charges up and releases a powerful purple Aether energy beam, requiring players to dodge skilfully to avoid getting hit
- Ground Slam - The Aether Worm slams its head into the ground, posing a threat to players beneath it. Seek cover in the nearby buildings, but remain cautious, as the attack can extend over buildings and sometimes the attack can still be felt as he slams onto the roof of some buildings
- Charge - Orcus can bury itself underground and charge towards players. Watch for a dirt cloud indicating its movement to evade the eruption. This can knock you up into the air and will require you to deploy your parachute. This can sometimes be a saviour as if large waves of zombies build up, it will give you precious time to regroup, reposition and rearm if necessary
- Aether Orbs - Orcus shoots out the Aether Orbs which fly off in different directions and slam into you now and again, breaking armour and taking a good chunk of health off you. Seek shelter in the buildings until they disappear or you can shoot them
With a prepared squad, defeating the Aether Worm Orcus becomes a manageable task. Even if faced with defeat, players can reattempt the Orcus fight by activating the story mission again.
Once you have completed destroying Orcus, the cut scene will play for the end of this mission.
Thanks for reading as always guys.
Henry