Showing posts with label zombie shield. Show all posts

Tuesday, 4 February 2020

Building the shield in Voyage of Despair zombies - Call of Duty Black Ops 4


Easter Egg Guide: Part 1 -- Part 2 -- Part 3 --


Hi guys,

here is how to build the sturdy, trustworthy and rather defensive of its own feelings, SHIELD in "Voyage of Despair" in Call Black Ops 4 Titanic level. There are 3 parts to find in a total of 9 possible spawn locations. These spawn in different places each play through.

First up, to make this little hunt for parts much easier to follow, we will start at the very back of the ship by activating the artefact on the Poop Deck. This will mean we can open doors that couldn't be opened until this was activated. Once this has been done, we will make our way back to the Forecastle are (Main Spawn area) where we will start our quest for the elusive shield parts.


So, on your marks.....get set.....poop.......as in make your way to the artefact location on the Poop Deck at the very back of the ship and activate it, then return to the Forecastle area so we can begin.


Shield Part Spawn Locations

Bridge Area - Bridging relations between the shield parts
Part 1 spawn location 1
The first part can be located by making your way from the Forecastle area to the Bridge area. This shield part spawn location is just to the left of the bridge which has the wheel and all the dials with levers.


Part 1 Spawn Location 2
From where the first part spawned on the Bridge, do a 180 while facing this location and head forward and take the first door on the left of which beside it is a torn in half life boat. As you go through the door, you will see a small storage section behind the main Bridge room and the part will be on top of a couple of wooden boxes. 


Part 1 Spawn Location 3
Also located in the bridge area, if you simply exist where part 2 was located near the wooden boxes, turn 90 degrees right looking down the bridge corridor, and take the second corridor on the right. Down this small narrow corridor section, the part will be on the banister on the right, half way down.


State Rooms - A Stately affair
Part 2 Spawn Location 1
If we make our way from the main spawn area, the Forecastle, and open the door that leads to the State Rooms, we can go down the corridor and take the door that is the first on the left to reveal the next part. It is sitting nicely up on a shelve with lots of warm and cosy looking towels.


Part 2 Spawn Location 2
Then come back out of the door you entered for spawn location 1 for this par and look down the corridor. You will see a wall at the bottom of the corridor, on the right hand side, that has a huge hole in it. Go through this hole and into the room, then take another left through the equally large gaping hole in this wall. When you finally enter the room, directly facing you should be a wooden chair next to a small cupboard, The second part location could be here on top of the wooden chair.


Part 2 Spawn Location 3
The last location for part 2 is on the opposite side of this corridor. Exit through the whole in the wall you came in and to the left slightly there is a narrow room taking you to the other side of this area. This room is full of towels. Keep going to the end of the corridor and take last door on the left. Here the part will be sitting on a very comfy looking chair which I wouldn't mind sitting on myself....looks comfy....but expensive.


3rd Hand parts - Provisionally speaking
Part 3 Spawn Location 1
This next part spawns in the 3rd Class Berths section. If you take the stairs going down from the Poop Deck into the 3rd Class Berths, take a left then go forward until you hit another set of stairs going down to the very bottom of the 3rd Class Berths. When you get to the bottom take a left 90 degrees and the part will have spawned on top of the banister.


Part 3 Spawn Location 2
From spawn location 1, if you take a 180 from where this part spawned, you will see another door on the far side of the stairs you came down. When you make your way through this opening you will notice more stairs on the right that will take you down to the Provisions area of the ship. Follow this long corridor down to the end and you will see the part sitting on top of the boxes at the end of the corridor.


Part 3 Spawn Location 3
The last spawn location for Part 3 is on top of boxes next to a huge crate of apples. To get here simply do a 180 when facing the spawn 2 location, then follow the corridor round until you get to the room which has the sign saying PROVISIONS with an arrow pointing in. As soon as you walk in on halfway down the room there is huge crates of apples. The part will be spawned on the boxes lower down in front.


Building the Ballistic Shield
Now we have all 3 parts for the shield, if we make our way to the Poop Deck, you will find a buildables bench in the centre area of where the door leads down to the 3rd Class Berths. 


Simply walk up to the bench and hold the use button on it and the skills to pay the bills will craft you a very cool ballistic shield which has 2 different attacks.


One is the melee attack and the other is where the shield is put in front of the player and a tiny gun that comes with it is used to blow some holes in zombie flesh, with great satisfaction.


Still unsure how to build it? Then check out MrRoflWaffles video below:


Thanks for reading as always.

Henry


Wednesday, 13 July 2016

Guard Of Fafnir Dragon Shield Buildable Guide in Gorod Krovi zombies - Black Ops 3


Map Layouts: Belsinki Square --  Department Store -- Armory --
Tank Factory -- Infirmary -- Supply Depot -- Operations Bunker -- Dragon Command

Buildables: Dragon Shield --

Secrets: Musical "Dead Ended" -- Drone Hat / Mask -- Pack A Punch -- Dragon Strike Crystal -- Gauntlet Of Siegfried -- Wrench -- Axe -- Malice --  Musical "Ace Of Spades" -- Musical "Samantha's Lullaby" --

Easter Egg Guide: -- Part 1 -- Part 2 -- Part 3 -- Part 4 --


Hi guys,

here is the buildable guide to show you how to locate the 3 parts for the Dragon Shield in Gorod Krovi zombies for Black Ops 3. There are 3 parts, as usual, to collect in order to make this awesome defensive weapon, it has a FIRE ATTACK as well as a MELEE attack which makes it a very powerful defensive and offensive weapon. It also strikes fear I am sure into the zombies hearts as when you see someone coming with it the menacing jaw your peering through is enough to make the undead dead again! Its proper name is not dragon shield but "Guard of Fafnir".

I bet your interested to know how we get this magnificent weapon of dragon sorcery, so lets get down to it:

Part 1 - Red Ruby


This first part can be found quite easily and is in plain site for each of the 3 possible spawn locations. It is the top part of the shield which has a Red Gemstone embedded in it along with some funky and creatively beautiful metal spikes sticking out of it.

It can spawn on the chair in the room which contains the Juggernaut Perk Machine. This is on the SECOND FLOOR of the burnt out building that can be entered as soon as you come out of the main spawn area. Go up the stairs and take a right and its the first room on the left:


The second location it can spawn in is just outside in the main street when you go out the door to this room that leads outside to the balcony. Take the stairs down to the street and immediately turn left and follow the wall round till you come to a lorry parked sideways. It will spawn just in between  the cab and the cargo box on the back as shown here:


The third and final place this first part can also spawn is inside the "OPERATIONS BUNKER" on the ground floor just across the street from the truck spawn location. Simply go into the bunker and turn left on the ground floor and near the radio equipment on the left, you will see a stack of shelves. The part will also spawn on these shelves if not at the other two locations.


Part 2 - Dragon Head

 
Where Part 1 spawns beside the Radio Equipment in the Bunker area, you will find that there is a set of stairs that will take you up a level to the INFIRMARY. Follow these stairs up and you will find at the top of the stairs, just to the left, 2 boxes, one white and one grey. In between these boxes is where the Dragons Head can spawn sometimes.


If the second part is not located between these two boxes, simply turn 90 degrees left and walk towards a set of bunk beds that are just a few steps away from here up a slight incline. This is the second possible spawn location for this part, on the lower bunks bed as shown below:


Again if its not located in this second spawn location, don't fret, we do have one more location up our sleeve. Simply follow the stairs, located just behind these bunk beds, to upstairs where the main infirmary area is with all the beds and blood splattered around the place. The Part is located just behind the surgical screen that's facing the DOUBLE TAP perk machine:


Part 3 - Building Bridges with razor sharp teeth


This last part is located in the building which you need to activate the bridge in order to get access to from the Infirmary area to the ARMORY AREA.  When you walk across the bridge you will be at the first spawn location for the 3rd part which is located on the wall at the end of the room as soon as you cross over the bridge and turn left as shown below:


If not in the first spawn location for the third part, simply follow the stairs down to the right of the first location and go down to the next floor and it will appear on the wall facing you as you come down the stairs.
 
 
If not at any of the before mentioned locations, then it is bolted to the wooden part of the floor boards in the next level down again beside the WONDERFIZZ machine locations to its left.


Once you have all 3 parts collected, simply locate the nearest build table and the Dragon Shield is now yours. Be careful with it its not a toy! :)
 
 
Still unsure of the locations? Then check out HERPS Youtube channel and video below to help you out:


Thanks for reading guys.

Henry


Sunday, 22 May 2016

Building the Zombie Shield in Zetsubou No Shima - Black Ops 3 Zombies


Map Layouts: -- Main Spawn -- Lab A Perimeter -- LAB A Swamp -- Laboratory A -- LAB B Perimeter -- Laboratory B -- Laboratory B Swamp -- Bunker -- AA Gun -- Docks

Secrets:  -- Gas Mask -- Skull of Nan Sapwe -- Zombie Shield -- KT4 Wonderweapon -- Masamune (KT4 Upgrade) -- Musical -- Golden Bucket -- Spider Bait --

Easter Egg Guide: -- Part 1 -- Part 2 -- Part 3 --


Hi guys,

here is the guide on how to build the ZOMBIE SHIELD in Zetsubou No Shima zombies. It is the same as most of the other Call Of Duty zombies levels that have contained the Zombie Shield, in that you need to collect 3 parts to construct it and then use the 3 collected parts on a BUILD TABLE in order to produce it.

So want to know how to get it? I wont hold you up any longer....


Part 1 Location - Poison Ivy

The parts can be of course picked up in any order that you wish, the first part, one of its possible spawn locations you will find is located just underneath LAB A. It is located on the wall which has the ivy growing up it....don't worry its not poisonous.....I think. Pick it up ASAP and get outta there.


If it is not located in the wall with the IVY growing on it, you won't have far to go to see the second spawn location. Its on the wall just to the right of the first spawn location where a yellow light is shining on the wall.


The third and final spawn location in this LAB A area is just adjacent to those first two locations on the wall and is on the pillar just behind where you can buy the Kuda Sub Machine Gun.


Part 2 Location - Stop swamping around


The second part spawns in the SWAMP AREA of LAB B. One of the spawn locations is on the tree in the central part of the swamp before you go up the hill as shown in the picture below:


The next location is just past this tree and take a left then head up the slight hill to the next tree you can see and the part will be hanging on it:


The last spawn location for the part in this area is located just away from the two trees on the other side where the land rises up a bit on a hill. The part is of course hanging on the tree that is up on this hill:


Part 3 Location - Bunker Buster Anti Hay Fever


The third and final part spawn locations are located in the bunker in the Anti Aircraft area. This is where the large anti aircraft gun towers over the scenery when you are down below it. Again there are 3 spawn locations for the part so lets get to it.

The first spawn location is quite easy and is right in the corner of the area just underneath the AA gun:


If your at that corner for the first spawn location in this area, simply spin around to your right and go up into the next bunker and turn immediately left, where you will find a pile of rubble laying on the left hand side of this bunker. Simply pick up the part and your good to go:

 
The third and final spawn location is located in the actual same bunker in some rubble, but is on the right hand side of where you entered the bunker....easy eh?:
 
 
Once you have all the parts simply find the nearest BUILDABLE TABLE and get to work crafting this awesome defensive weapon. Not that the zombie shield is needed later in the game to be electrified and then used to hit the control panel at the zipline to short circuit it so that it lets the gates open to it. This step allows a person to drop down into a secret area and to retrieve 1 of 3 COGs which are meant for the elevator repairs, as part of the MAIN EASTER EGG.
 
If you are still unsure about all of the Zombie Shield Locations then check out Mr RoflWaffles Youtube video below:


Thanks for reading as always guys
 
Henry


Saturday, 14 May 2016

Building the Rocket Zombie Shield in Der Eisendrache Zombies - Black Ops 3


Der Eisendrache Map Layout: Main Spawn Area -- Outside Castle Gate -- Main Lower Courtyard Area -- Trophy Room -- Upper Courtyard -- Living Quarters -- Armory -- Mission Control -- Family Crypt -- Undercroft -- Teleporter Room -- Rocket Platform --


Easter Egg Guide Walkthrough: -- Part 1 -- Part 2 -- Part 3 -- Part 4 --


Hi guys,

here is the guide to finding the parts and building the Zombie Shield in Der Eisendrache Zombies. There are 3 general locations that the zombie shield parts spawn in, but they can be in different locations of these areas on each play through.


Part 1 - Lower Courtyard - Frank the "TANK" part


This part is located in the lower courtyard which is near the Double Tap machine gate that must be opened in order to gain access to this area from the main spawn area side. The tank for the zombie shield is sitting on top of several storage boxes and is easy to see when you head over to the corner to pick it up. If you are unsure of where I am talking about, please refer to the map below marking its possible 3 spawn locations in this area:


Part 2 - Upper Courtyard - Frontal Main Body of the Shield


This part is located in several places again, one is just outside the entrance to the MISSION CONTROL area to the right of its entrance door. The others are marked on the map below. This part has an Eagle on top of it and is the main body of the shield that is going to take all the biting, scratching and ass kicking from the zombie hordes.


Part 3 - Undercroft - Defy the Laws of Gravity


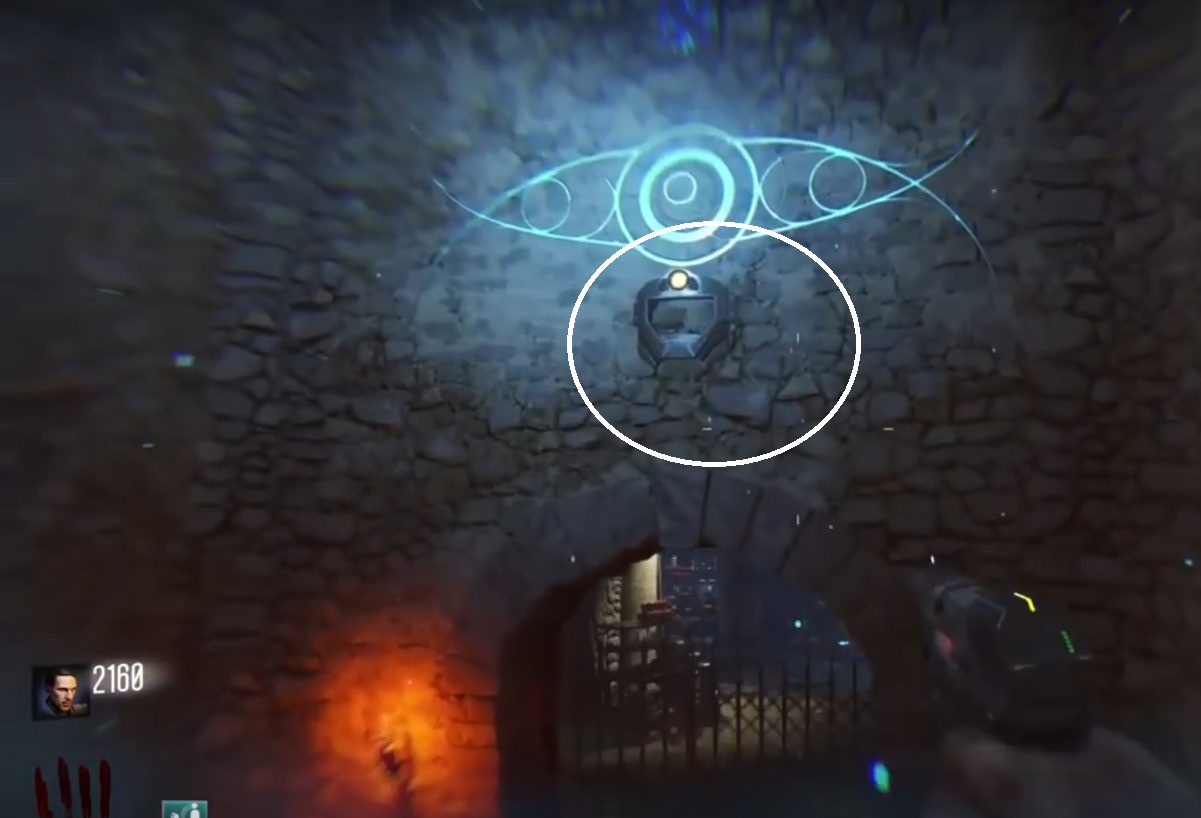
The 3rd and final part of the Rocket Shield is located in the UNDERCROFT area of the castle. This is the room with the pyramid in the centre, the MPD, and the part is actually located high up on the walls and is not accessible at foot height. Here we need to activate the anti-gravity within the room to boost us up onto the wall in order to grab it.


To activate the anti gravity, stand on the four floor tiles located around the pyramid shaped MPD until they glow blue. Once all 4 are activated, the anti gravity within the room will become active and you will have a spring in your step allowing you to wall run around the room and be able to get close enough to grab the parts. Check out the map below to see the spawn locations of this part in the UNCERCROFT area:


Once you have collected all of the parts simply take it to the nearest BUILDABLES TABLE and voila here you have your Rocket Zombie Shield that blasts zombies sky high and away into the distance, great for a defensive weapon and when in tight corridors and corners.


If your still unsure how to build this Rocket Shield then simply check out the video below from TheSmithPlays on Youtube: